Last updated: 1 May 2023
Hi there! In this article, I’ll be sharing four of the best techniques for achieving professional-grade caulking results. Whether you’re a DIY enthusiast or a professional contractor, these tips will help you achieve a smooth and flawless finish. Let’s dive right in.
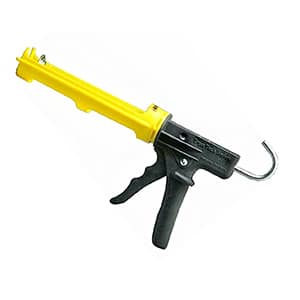
Use the Dripless Gun
The first tip is to use the dripless gun if you haven’t used a dripless gun before. Every time you squeeze the trigger and then release the drive backs off a little bit which releases the pressure from the tube.
That means you don’t get extra caulk or sealant squirting out a tip that you didn’t attempt.
When you’re laying down a bead of caulk you’re in control of it. You’re not getting these blobs or these losses that sometimes come out with a non-dripless gun. Another factor to keep in mind with the dripless gun is that they typically only cost a few dollars more than a standard caulk gun.
Cut the Tip at a 45-degree
Tip number two – is just cut the tip an in our caulk. I like to try and make this as small as possible and do it at a 45-degree angle so that the caulk comes out nice and smooth when we’re putting it at an angle.
Move Fast
Tip number three is to work quickly while caulking. It can be challenging to match the flow rate of the caulk with your speed, resulting in uneven and messy application. However, if you can learn to move as fast as you can squeeze the caulk out of the tube, you’ll achieve a smooth and consistent bead every time. This technique will help you achieve professional-looking results with ease.
Use Soapy Water
Tip number four – use soapy water when tooling. Tooling is the process of smoothing out the bead of caulk to make it nice and smooth.
I’m just mixing some dish soap and some water in a bowl. Using soapy water when you’re caulking or especially applying any sort of a sealant like silicone or polyurethane makes a huge difference. Because these types of sealants are typically very sticky and they tend to stick to your finger as well. But the soap helps repel them making it easier for you to use your finger for tooling.
Final Thoughts
I hope these tips have been helpful in achieving professional caulking results for your next project, whether it’s in a dry area like baseboards or trim or in a wet area like a kitchen, bathroom, or RV. A well-done caulking job not only enhances the appearance of your home but also provides better protection against moisture and air leaks. Thank you for reading, and happy caulking!


Leave a Reply