Last updated: 1 May 2023
Using a paint roller can be a hit-or-miss experience if you’re not familiar with the proper technique. You may have tried rolling without much success, gradually improving with practice. Or, you may have followed the instructions and learned that you need to apply the paint in a specific pattern, usually in a “W” shape.
Painting walls isn’t a cakewalk, especially the large walls. Once you have the appropriate equipment, painting a huge wall goes significantly quicker. Fortunately, there are several alternatives for a simple and effective painting job.
A paint roller spans greater volume per swipe than a paintbrush, and the length can be extended for reaching places that are tough to reach.
We’ll take a somewhat unique approach this time. We’ll show you how to rapidly apply a flawless, uniform layer of latex paint on the walls in this post.
It may not be flashy, but it certainly works quickly and avoids issues like bright spots, roller tracks, and built-up wrinkles, which may be problematic for newbie painters. Without further ado, let’s hop into it!
What Tools and Gears You’ll Need
- Paint
- Roller brush and cover
- A container
- Water
- Drop cloth
- Lint roller
Before we get into the grand scheme of things, you must first select the appropriate roller. The sort of rollers you’ll require is determined by the project and the paints you’ll be applying.
Step 1: Spread the Paint in a Container
In a painting pan, spread one inch of paint. Ascertain that the painting container is on a horizontal surface. Undo any packing from the roller covering and put it on the rolling grip.
Buying in higher-end covers for a superior paint job for painting will yield better results. The lowest roll covering alternatives don’t retain as much paint as the more expensive alternatives. Therefore, that means a paint job will take considerably longer.
Step 2: Damping the Roller
Wet the roller covering with water to prepare for a paint job. To eliminate the water from the inside, swirl the paint roller. Using a towel or a dropping towel, wipe and wipe the cover clean.
This prepares the roller for uniform absorption and application of paint before putting a woolen covering into the paint, utilizing a lint roller or paper to eliminate stray strands.
Step 3: Roll the Roller in Paint
Roll the roller through the paint until it becomes wholly coated. Filling a new roller brush usually takes 5–6 cycles. To eliminate extra painting, run it against the edges of the paint screening or container. Excessive paint should be removed to avoid paint dripping on the wall.
Step 4: Roll on the Wall
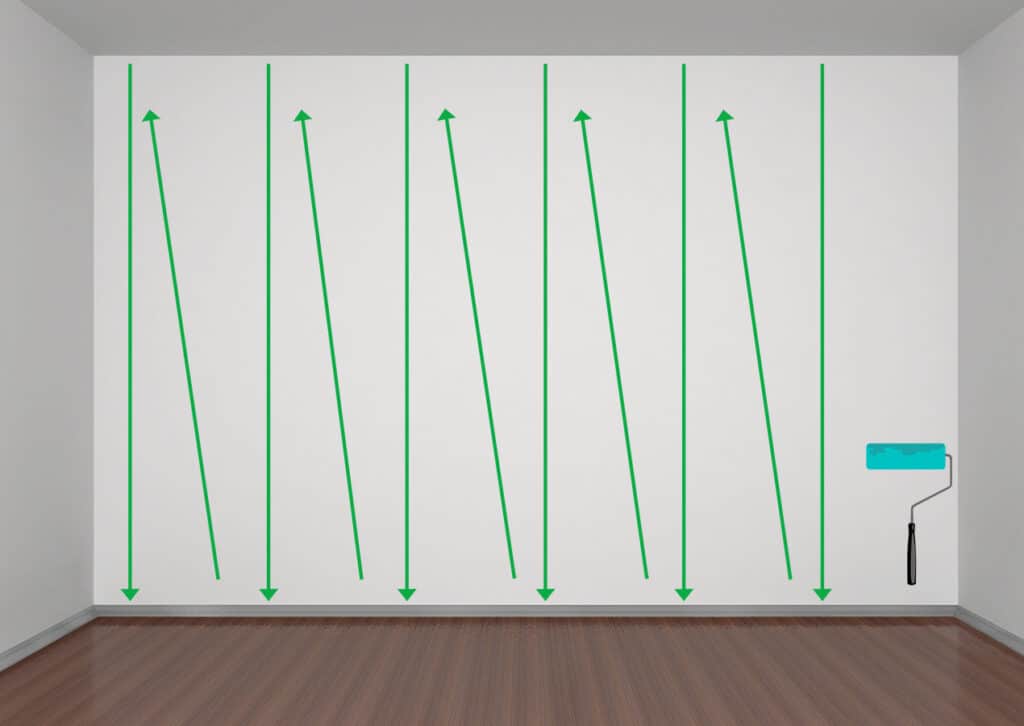
Brush a swipe of paint roller from top to bottom with equal stress, beginning a few feet from the wall bottom. Do not use too much pressure while rolling since the fibers of the roller covering will become matted; instead, let all the painting do the majority of the job. If your roller brush too firmly, your paint may thicken around the roller’s borders.
Halt a few centimeters from the roof when you’re deploying a paint roller with an extendable grip. Roll the roller downwards without raising it. As you proceed over the wall, maintain the exact steady pressure.
Step 5: Keep at the painting job
Proceed in a crisscross or “W” rhythm till the roller’s paint has thinned. To guarantee an equal coating over the whole surface, keep the zigzag pattern contained inside an area of the wall. Rolling in a crisscross or a zigzag manner smooths away roller markings at the stroke’s ends.
Step 6: Finish Painting
Refill the roller as required and brush paint in portions to the wall (ceiling) until it is completely coated. Use a similar procedure to apply a second layer on top of the first if necessary.
Conclusion
Whether you’re painting a wooden box or a massive wall in your apartment hall, one thing is for sure, and that is having excellent paint gear. Only then you’ll be able to pull off a pain job effortlessly.
In this post, we have provided some basic steps that can help you paint your walls efficiently. Although the method we explained may not win you any painting contests, it will do a thorough job. We would love to hear from you if this method has been helpful for you. Do you now feel confident about painting the walls or ceilings in your room, hall, or anywhere in your house?


Leave a Reply