Last updated: 1 May 2023
Do you want to paint your house by yourself but always the paint ends up flowing in places you don’t want to paint? Have you again messed up the wall while adding patterns and curves? If yes, then you do not know about painter’s tape. Painter’s tape is a wonder DIY tool that has simplified the process of painting.
While painter’s tape is a commonly used tool in the painting process, it can be tricky to work with for some people. Issues like paint bleeding, flaking, and poor adhesion can make using painter’s tape frustrating. But with the right tips and techniques, these problems can be easily solved. In this article, we’ll provide you with the guidance you need to use painter’s tape like a pro.
What You Will Need To Follow This Tutorial
- Water
- A piece of cloth
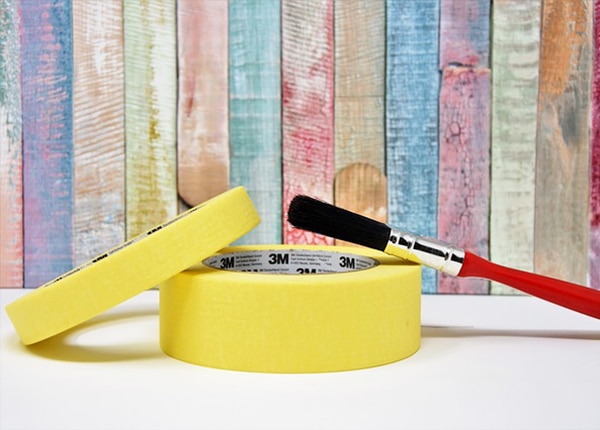
- Painter’s tape
- Scissor
The Steps You Need To Follow To Get Flawless Results
Clean the Surface Properly Before Applying Painter’s Tape
Make sure the moldings and any other areas where the tape will be applied are clean before you begin. The surface should be dusted. Clean the surface with a wet cloth. If the surface is oily, clean it with soap and water before allowing it to dry fully. After that, begin taping.
Apply Tape
You may begin applying your painter’s tape after you have a dry, clean surface. Taping off the ceiling line or the baseboard is a good place to start when painting interior walls. Start at one corner of the room and rip off lengths of tape no bigger than your arm in each direction. Cut the tape at an angle to suit the corners.
How to Apply Painter’s Tape to Interior Corners and Ceilings
Getting a straight line while painting can be a challenge, even when using painter’s tape. However, there’s a simple trick to achieving perfectly painted corners and edges. Start by painting the first color around the corner or ceiling edge. Once the paint has dried, use tape designed for use with fresh paint (such as 24-hour tape) to mask off the freshly painted side. This technique will help you achieve crisp, clean lines every time.
Rather than trying to tape exactly down the middle of the corner, extend the tape 1/8″ away from the corner, at which a straight line will be simpler to achieve. The next step is to push down the tape’s tip to ensure that it is completely sealed.
How to Apply Painter’s Tape to Baseboards and Trim
While putting painter’s tape to baseboard trim, choose a flexible putty dagger to create pressure as you set your tape line for the greatest results. Begin by placing 6″ of tape on your surface, then unrolling another 6″ of tape. Laying tiny amounts of tape at a time can aid in keeping your tape straight.
Press and Settle the Tape
Flatten the tape down with your hands as you apply it to your borders to verify that it sticks properly and that there are no creases or dust particles that might prevent you from getting a clean, straight line. Instead of applying a complete run of tape and then flattening it, it’s easier to push the tape down and smooth it out as you go.
Start Painting
When it comes to painting a room, getting started can be daunting. One helpful tip is to begin by applying painter’s tape to all borders, such as where the wall meets the ceiling or trim. This will protect those areas from unwanted paint and help you achieve clean lines. From there, you can use a technique called “carving in,” where you paint around the border first and then fill in the rest of the wall. While some paint may get on the tape, that’s okay – the tape is there to protect your floors and ceilings. Just be careful not to overload the tape with too much paint.
Remove the Tape Without Peeling off the Paint
You may remove the tape after the paint is dry to the touch. Gently pull the tape at a 45-degree angle. Pull the tape at the base when you’ve removed a foot of tape. Remove all of the tapes from the walls, moldings, and wherever else you’ve used them to show your completed job.
You won’t be capable of removing your tape while the paint is still wet; it’s critical to invest in a high-quality tape that can be securely left on for many days. Regardless of the type of painter’s tape you used, you must probably wait three days before removing it.
Final Words
We’ve all heard that the proper use of painter’s tape can make or break a job. So, in the preceding post, we discussed the tried and true methods of using painter’s tape. We hope you found it useful.


Leave a Reply